If you dedicate more than an hour each day to Instagram, the application might experience sluggish performance and decreased responsiveness. One contributing factor to this issue is the cache – a compilation of transient files that the app retains on your device. In this guide, we will elucidate the step-by-step process of purging the Instagram cache.
What is cache on instagram?
A cache is typically indispensable as it accelerates the loading time of websites and apps and can enhance the overall efficiency of a device.
The Instagram application also employs a cache to retain data like images, text, and layout, ensuring quicker loading upon revisiting the app. Nonetheless, if the cache grows excessively large or becomes outdated, it can impede the app’s speed and lead to other complications.

It’s advisable to periodically purge the cache on the Instagram app. Doing so can liberate storage space, resolve issues within the app, and enhance its overall performance. It’s also a recommended routine to clear the cache when encountering problems like sluggish loading times, app crashes, or error messages.
Instances where you may need to clear the cache on Instagram;
How to clear Instagram cache on Mobile OS?
QUICK ANSWER;
Open “Settings” on your phone.
Once in settings, scroll down the menu and tap “Apps.”
Then, select “Manage Apps.” You should see a list of apps on your device.
Search for the Instagram app and select it.
Once you tap on Instagram, select “Clear Data.”
To clear the Instagram cache on an Android device, you can follow these steps. Please note that the exact steps might vary slightly depending on your device model and Android version:
Step # 01;Open mobile Settings:
Navigate to your device’s settings. This is usually represented by a gear icon and can be found in your app drawer or on the home screen.
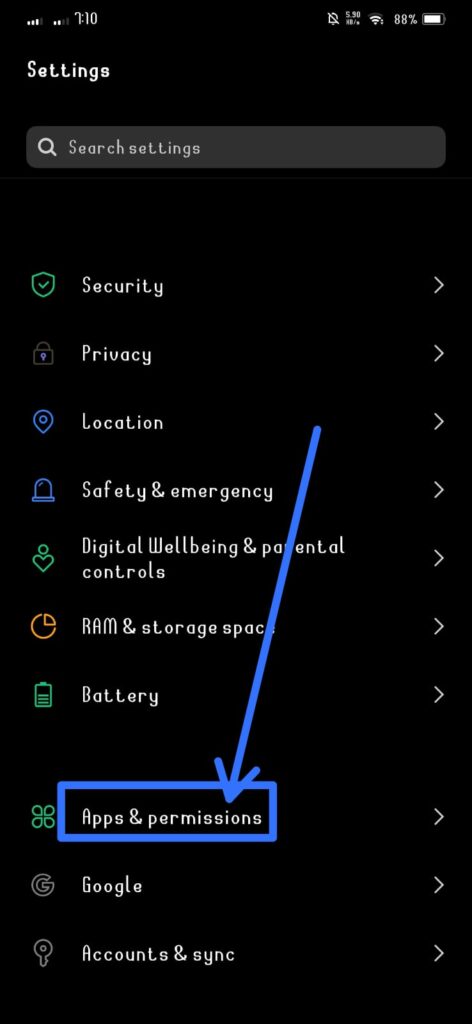
Step # 02;Apps & permission:
Scroll down and look for “Apps & permission or a similar option. This is where you manage all your installed apps.
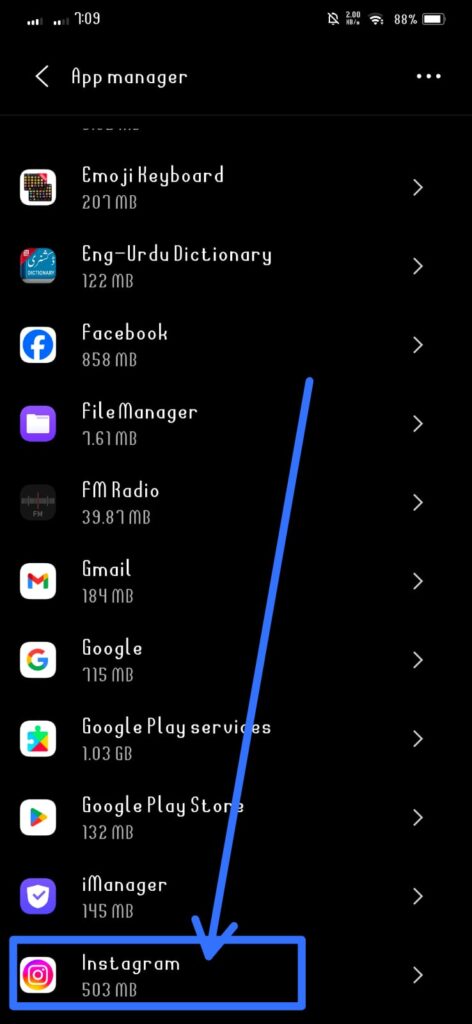
Step # 03; Find Instagram:
Scroll through the list of installed apps to find Instagram. Tap on it to open the app settings.
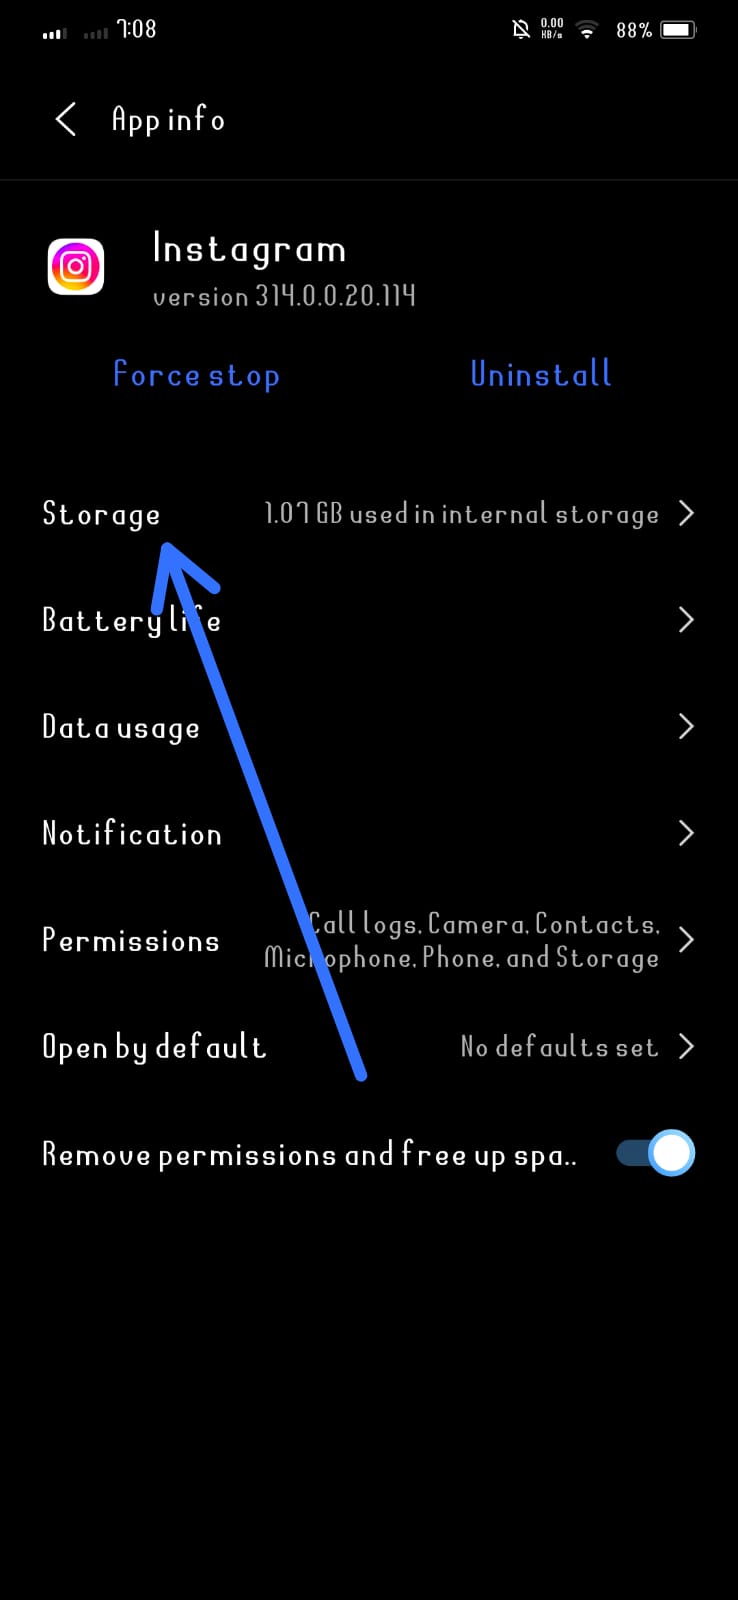
Step # 04; Storage:
Inside the Instagram app settings, look for the “Storage” option. Tap on it.
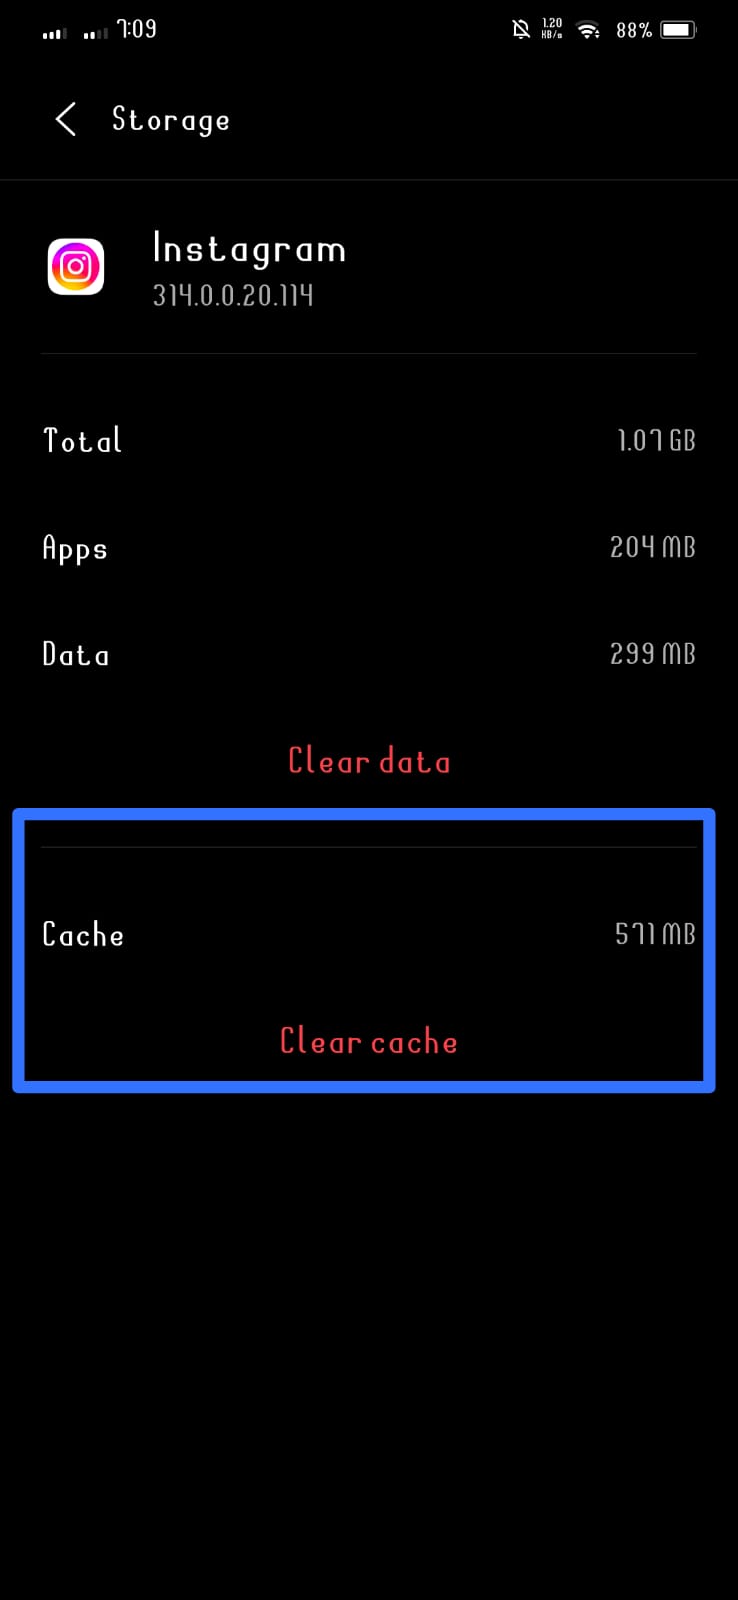
Step # 05; Clear Cache:
You should see an option to “Clear Cache.” Tap on this option to clear the cache associated with the Instagram app.
Step # 06; Confirm:
A confirmation prompt may appear. Confirm that you want to clear the cache.
Step # 07; Restart Instagram:
Close the Instagram app if it’s open, and then restart it. This step ensures that the changes take effect.
How to clear Instagram cache on desktop?
Step # 01; Open Instagram in Chrome:
open instagram app, make sure are login instagram.com,
Step # 02; Access Developer Tools:
Right-click anywhere on the Instagram page and select “Inspect” or press Ctrl + Shift + I (Windows/Linux) or Cmd + Opt + I (Mac) to open the Developer Tools.
Step # 03; Go to Application Tab:
In the Developer Tools, find and click on the “Application” tab.
Step # 04; Clear Storage/Cookies:
On the left sidebar, find and click on “Storage” or “Cookies” under the “Application” tab.
Step # 05; Clear Site Data:
You may find an option to clear site data or cookies for Instagram. Click on it.
Step # 06; Reload Instagram:
After clearing the site data or cookies, close the Developer Tools and refresh the Instagram page.
Is clearing cache acceptable?
Yes, deleting cache is generally okay and can be helpful and helps improve an app’s or device’s performance. Clearing cache can help improve the performance of apps and websites. It frees up storage space and allows the application to fetch new data, potentially resulting in faster loading times .Cache files can accumulate over time and take up a significant amount of storage space. Deleting the cache helps reclaim that space, which can be important, especially on devices with limited storage. Clearing the cache ensures that the app fetches the latest data from its servers, preventing the display of outdated or incorrect information.
Why am I not receiving alerts despite having them enabled?
If you’re not receiving notifications on your device even though they are turned on, several factors could be contributing to the issue. Here are some common reasons and troubleshooting steps to help you resolve the problem:
Check App Settings:
Ensure that notifications are enabled within the app settings. Go to the app’s settings and look for the notification preferences to confirm that they are turned on.
Device Settings:
Check your device’s settings to make sure that notifications are enabled globally. Go to your device’s settings, find the “Notifications” or “Apps” section, and verify that notifications are allowed for the specific app.
Do Not Disturb Mode:
Confirm that your device is not in “Do Not Disturb” mode. This mode can suppress notifications. You can find and adjust this setting in your device’s settings menu.
App Updates:
Make sure that the app is up to date. Outdated versions of apps can sometimes have compatibility issues, including problems with notifications.
Network Connection:
Ensure that your device has a stable internet connection. Notifications may not be delivered if your device is not connected to the internet.
ALSO READ; How to deactivate an instagram account?
FAQS;
CONCLUSION;
If you engage with Instagram regularly, data accumulates on your device over time, requiring periodic cache clearance to optimize the app’s speed. However, it’s advisable not to delete Instagram data excessively, opting instead to clear the cache when the app experiences significant slowdowns or crashes.
If concerns about potential data loss arise during the cache-clearing process, you can consider downloading essential data before initiating the clearing procedure. Refer to our guide for step-by-step instructions on how to safeguard your data prior to clearing the Instagram cache.

