
Instagram, a transformative social media platform, has significantly impacted the lives of countless individuals in recent times. It has become ubiquitous, with nearly everyone having an account. Whether for business endeavors or as a source of entertainment, Instagram has become an integral part of people’s daily lives. The bio feature on Instagram allows users to share information about themselves with the world. For those who wish to add a personal touch, some may consider incorporating their location into their Instagram bio. This article will guide you on the process of adding a location to your Instagram bio, providing a personalized touch to your online presence.
What is an instagram location?
Your Instagram bio serves as a succinct canvas where users can encapsulate their essence in 150 characters. Utilize this space to introduce yourself, incorporating elements like your name, hobbies, or meaningful quotes. It’s your opportunity to convey a snapshot of who you are and share it with the world. Let your Instagram bio be a reflection of your personality, creating a concise yet compelling narrative for anyone who stumbles upon your profile.
How to add location to your bio on instagram?
You can add any desired location to your Instagram bio from the Edit profile page. Keep reading to read the steps demonstrating the same in detail further in this article.
Method # 01;(copy link);
step # 01;Open Google Maps:
Go to the Google Maps website (maps.google.com) or open the Google Maps app on your mobile device.
step # 02;Search for the Location:
Enter the location you want to share or find on the map in the search bar.
step # 03;Get Location Details:
Once you’ve located the place, click or tap on the location on the map to reveal more details.
step # 04;Share Button:
Look for the “Share” button. It’s usually represented by an icon that looks like a curved arrow or the word “Share.” Click or tap on it.
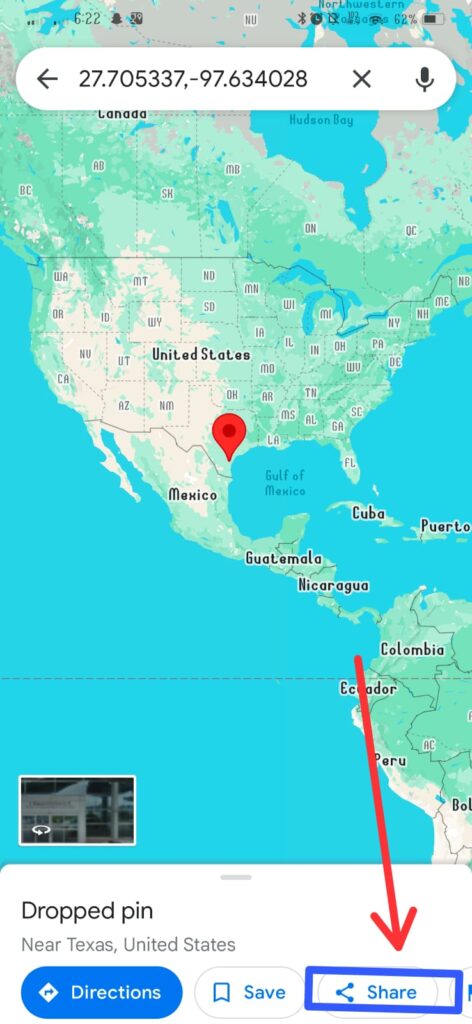
step # 05;Copy Link:
In the sharing options, you’ll see a “Copy Link” or similar option. Click or tap on it to copy the link to your clipboard.

Method # 02;(share location on instagram);
To add or update your location on Instagram, you can follow these steps:
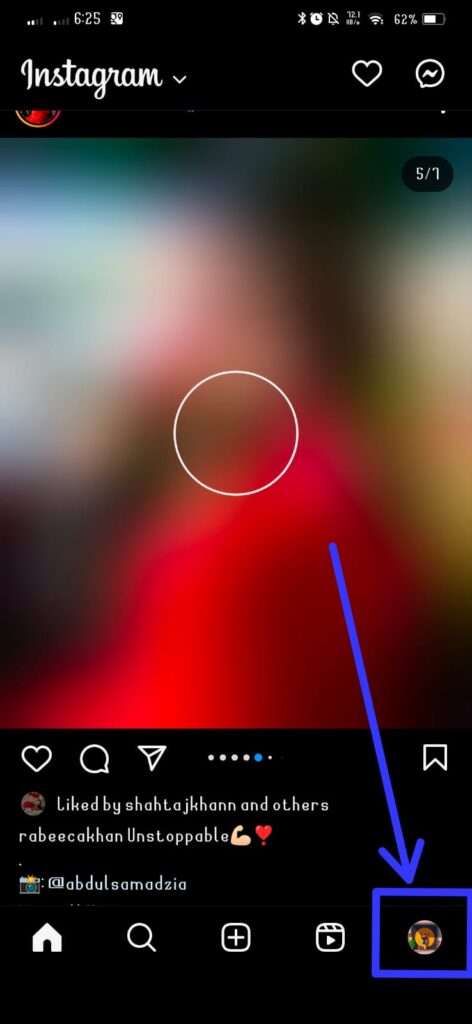
step # 01;Open Instagram:
Launch the Instagram app on your device and log in to your account.
step # 02;Navigate to Your Profile:
Tap on your profile picture or navigate to your profile by clicking on your profile icon located at the bottom of the screen.
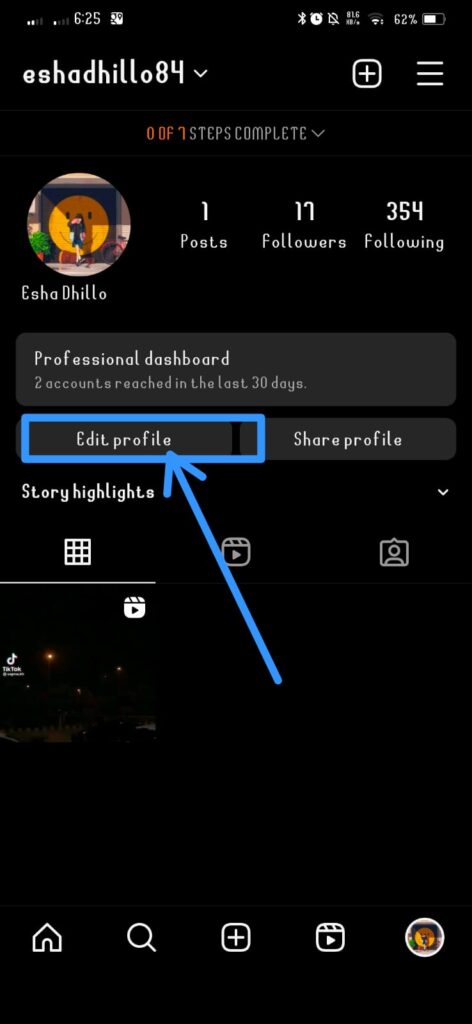
step # 03;Access Edit Profile:
Once on your profile, locate and click on the “Edit Profile” option. This will take you to the page where you can modify your profile information.
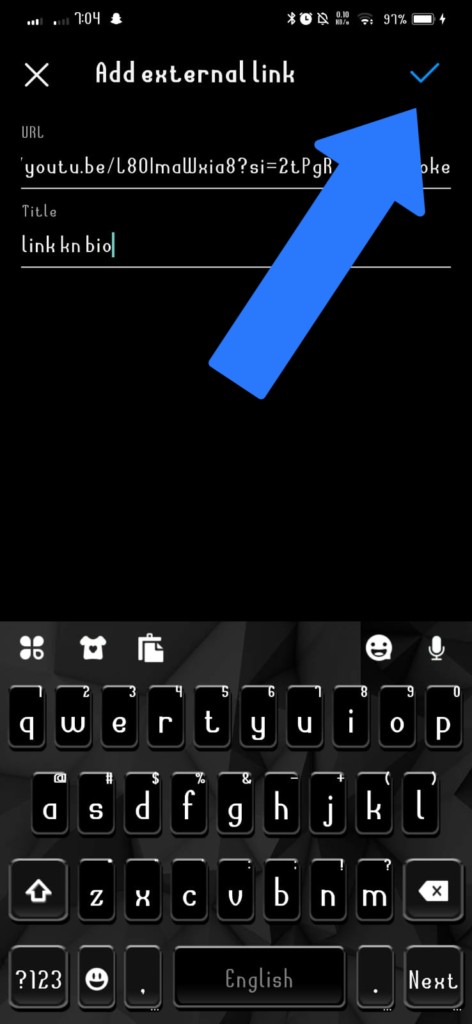
step # 04;Add Location to Bio:
Look for the designated section where you can edit your bio. Here, you can type in the desired location information you want to include.

step # 05;Save Changes:
After adding the location to your bio, make sure to save the changes. Look for a “Save” or “Done” option (the wording might vary), usually found in the top or bottom right corner of the screen.
How to add location to your story?
- Open Instagram: Launch the Instagram app on your mobile device.
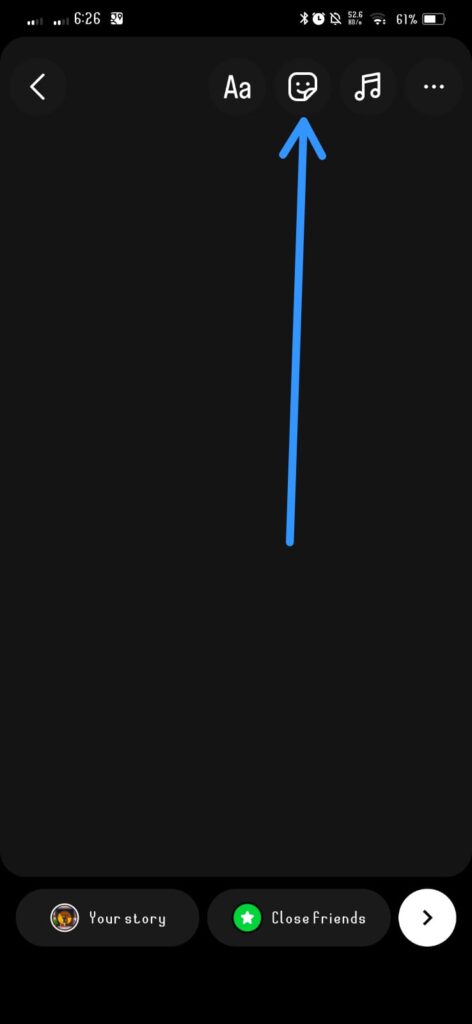
Create a Story: Swipe right from your Instagram feed or tap on your profile picture to create a new story.
Capture or Select Content: Capture a photo or video using the camera, or choose an existing photo or video from your gallery.
Tap on the Sticker Icon: In the top-right corner of the screen, you’ll find a square smiley face icon. Tap on it to open the sticker menu
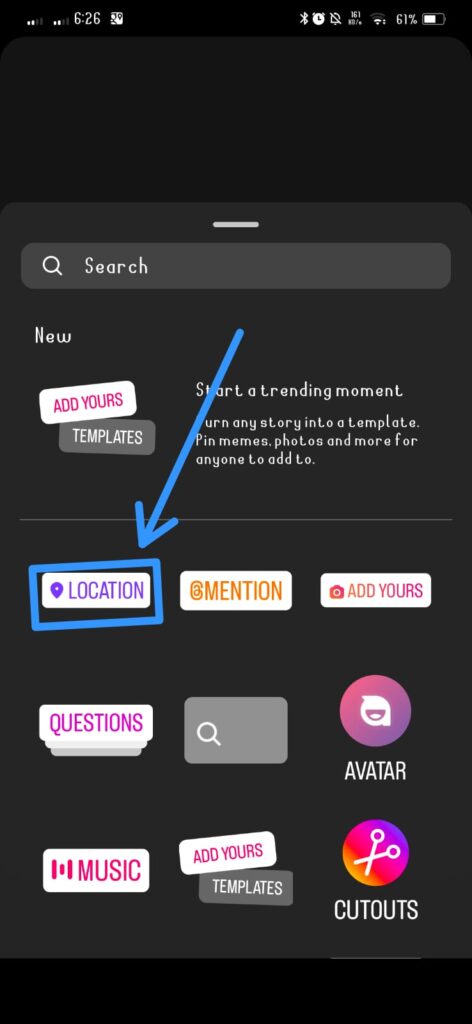
Select Location Sticker: Look for the “Location” sticker. It’s usually represented by a pin icon or the word “Location.” Tap on it.
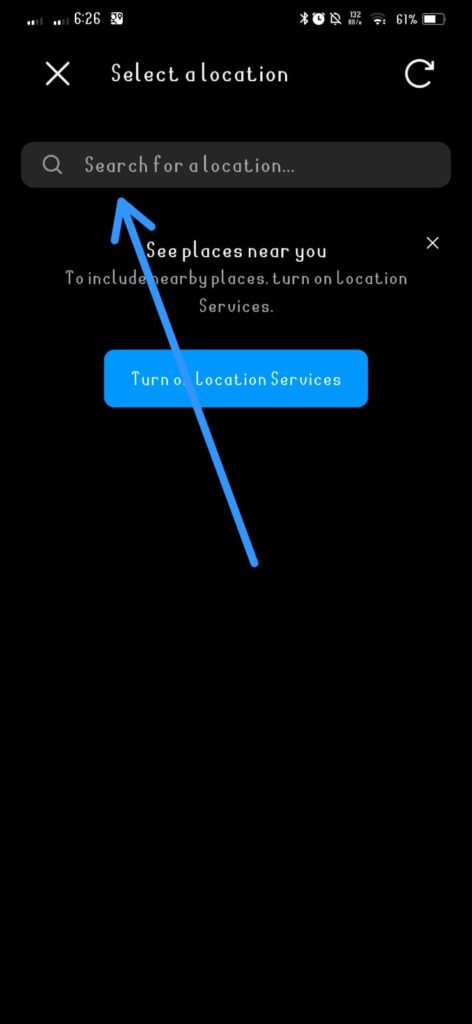
Choose or Search for Location:A list of nearby locations will appear. You can either select one from the list or use the search bar to find a specific location.
Adjust the Sticker:Once you’ve added the location, you can move and resize the sticker on your story. Place it wherever you prefer.
Share Your Story: After adding the location sticker, you can continue to add other stickers, text, or drawings to your story. When you’re ready, tap on “Your Story” to share it with your followers.

FAQS;
CONCLUSION;
In conclusion, adding a location on Instagram is a simple yet impactful way to provide context to your content, connect with your audience, and enhance your online presence. Whether you’re sharing a post, story, or updating your profile, the process is user-friendly and can be accomplished on both the mobile app and desktop versions of Instagram.
By incorporating your location, you not only personalize your Instagram experience but also make it easier for others to discover your content based on geographical interests. Remember that privacy settings allow you to control who sees your location information, giving you the flexibility to share as much or as little as you prefer.
Regularly updating your location, especially when relevant to your posts or activities, can contribute to a more engaging and dynamic Instagram profile. Stay mindful of Instagram’s evolving features and settings, and don’t hesitate to explore additional location-related options, such as geotags, to further enhance your social media presence.